Yesterday, my husband and I sat down to do some meal planning for the coming week and round out our grocery shopping list.
Every so often, Tim likes to make clam chowder. He has not made it in awhile, and floated the idea. I like his clam chowder very well. Usually, we buy a couple of cans of clams, which is fine. But this week it morphed into something else.
It started when I suggested that we use some sort of firm white fish instead of clams. But when we got to the market, their white fish didn't look all that great. But they had shrimp! But I had to promise to peel them.
Today, while we were out and about, I asked Tim, could we add curry powder? Tim responded, I don't think it would work with the milk, but maybe coconut milk? I said, that sound great!
A plan began to develop in Tim's mind.
He sautéed onions and garlic in one pot, and cooked about 2-1/2 pounds of small red potatoes (cubed) (unpeeled) in a separate pot, so he could drain off the starchy water. When the potatoes were fork tender, he added two cans of coconut milk to the onions and added the potatoes as well as some cardamom, turmeric, cumin, salt, and black pepper. When that was heated through, he added the shrimp and simmered just until the shrimp were pink.
It was very tasty, but I'm not sure it conforms to the strict definition of chowder.
Showing posts with label in the kitchen. Show all posts
Showing posts with label in the kitchen. Show all posts
Sunday, December 22, 2013
Thursday, November 28, 2013
Baklava
Yesterday afternoon, for no particular reason other than that I had the time and I've been wanting to do this for awhile, I made baklava.
Some time ago, I bought a package of phyllo dough and used half of it for something else that was, shall we say, less than successful. But no matter.
Since then, the other roll of phyllo dough in its box had been taking up space in the freezer.
For several years now, baklava has been one of my favorite desserts. I think I became most familiar with it when it would show up in Christmas gift baskets at the place I used to work. I absolutely love the honey-infused juiciness when I bite into a piece.
Anyway, I found this recipe. Seemed simple enough. The only ingredient I had to purchase was the walnuts. And since I had only the half package of dough, I cut the quantities in half.
It turned out to be one the quickest, easiest things I've ever made.
And without doubt, one of the most delicious.
 |
| Fresh out of the oven |
 |
| In their individual cupcake papers |
Friday, June 28, 2013
Raspberry-Apple-Maple Crisp
Two weeks ago, my raspberries were just starting to ripen. Now, they are at their peak. I can pick about a cup each day.

They are very small, and it has been pretty rainy the last week or so, so they are not as firm as they might be. When I am picking, some are so full of moisture they fall apart at the slightest touch.
I like to eat them for breakfast with vanilla yogurt and granola. But I think my favorite way to have berries is in a crisp.
I usually use the recipe in my Better Crocker book, but today I wanted to find a recipe that didn't use butter and did use maple syrup. An internet search turned up this recipe.
I made a couple changes, because the berries I had on hand didn't amount to 24 ounces. So I diced a Honeycrisp apple to get close to the amount of fruit specified.

Now, if I only had some vanilla ice cream. . . .
Monday, May 27, 2013
Banana Fritters
For some time now, I've been wanting to make a recipe I haven't made in quite awhile. It was something my mother would often make on the weekends when my sisters and I were kids. I think it was a recipe she had grown up with as well. Around the time I left home (I can't recall if it was when I went off to college or after I graduated from college), my mom gave me a small red binder with a few recipes that she had typed out — family recipes that she wanted to pass on. I'm pretty sure each of my sisters has something similar as well.
One of the recipes was for Banana Fritters. Now, I'm not a big fan of bananas, certainly not in their native form. Too mushy. But I like Banana Bread, and I like Banana Fritters.
Basically, Banana Fritters are little pancakes with banana slices in them. Generally, I am not a big pancake eater — they're rather carby. But as I said, I've been thinking that it would be fun to make them again. I see the recipe every time I make cornbread muffins — it's on the same page.
So a couple days ago, I announced to my husband that for breakfast on Monday I would be making Banana Fritters.
I departed somewhat from the traditional recipe, however, to suit some individual preferences, substituting coarse cornmeal (polenta) for half the flour and using buttermilk instead of plain milk. And they turned out just fine. They may not be the prettiest meal in the world, but they are tasty!

Banana Fritters (revised)
Serves 2.
1/4 cup flour (I used whole wheat)
1/4 cup coarse cornmeal
1/8 teaspoon salt
3/8 cup buttermilk
1 egg
2 bananas (this is a really good way to use bananas that are past their prime)
Mix flour, cornmeal and salt; add milk gradually. Beat egg and add.
Slice 2" pieces of banana in half and stir gently into batter.
Heat 1/2 tablespoon oil in a large pan. Spoon banana pieces into pan and brown on both sides. (They are ready to turn over when the edges start looking dry.)
Serve with honey or syrup.
Thursday, January 10, 2013
Corn Muffins
I can't remember exactly when this happened. but at some point in time after I graduated from high school and left home, my mother gave me a small binder with some typewritten family recipes. These were recipes that had been handed down from her mother or grandmother, or were family favorites that she had picked up along the way.
I have made a number of them over the years, but one that I make on a regular basis is Pyle's Corn Meal Muffins. The "Pyle" referred to in the recipe name is a grandmotherly woman who was the favorite babysitter of me and my sisters when we were kids. Her name was Edith Pyle, and in the way of children, we shortened "Mrs. Pyle" to simply "Pyle." The two things I remember most about her were playing Hide the Kleenex (a variation of the game Hot and Cold) and her letting us comb out her long hair.
She was a really sweet lady.
The recipe as written calls for 2 tablespoons of shortening (bacon fat). Back in the day (the 1960s), my mother would collect bacon grease in an old marmalade jar on the stove. She would then use this to fry eggs or pancakes.
For a number of years, I would substitute margarine or butter in this recipe, but the muffins always turned out too crumbly. Then (I can't remember exactly when) I decided to try actual bacon grease.
OMG, it made all the difference! Now, I don't/won't use anything else.
In the interest of full disclosure: I am an unabashed, unapologetic carnivore. I like meat, and I like bacon. The only exception was when I was pregnant, but that is another story for another time.
Anyway, when my husband and I fry up bacon, we often save the grease in a jar for storage on the refrigerator and for me to use in when I make corn muffins. I try to have 1 or 2 glass containers stored away.
To my mind, there are few foodstuffs as toothsome as a corn muffin fresh out of the oven. With butter. And honey. . . .
So without further ado, I present: PYLE'S CORN MEAL MUFFINS
Pour 1 cup boiling water over 1cup corn meal and 4 tablespoons bacon fat. Let stand 1 hour.
Sift and add: 1 cup flour, 4 teaspoons baking powder, 3/4 teaspoon salt
Add 2 beaten eggs and 1 cup buttermill.
Pour batter into greased muffin tins (12 total).
Bake 25 minutes at 425 degrees.
Enjoy!
Monday, December 31, 2012
Ostakaka
Addendum, December 22, 2013
Since I first posted this nearly one year ago, it has become the most visited blog post, with 119 hits to date. The rate seems to have picked up recently, with the holiday season. I am curious to find out why. So, if you would be so kind as to leave a comment as to how you found this post, why you might have found it, and what you intend to do with the information herein, I would be truly appreciative. Happy Holidays!
Since September of 2009, I have been transcribing several notebooks filled with my dad's handwritten, biographical musings. About a year ago, I was typing up a short section where he reminisced about three traditional Swedish dishes from his childhood.
One of these — gryn— I had heard about. The other two — ost-kaka and greda-kaka — were unfamiliar. Out of curiosity, I contacted my Aunt Jean, the wife of my dad's younger brother Vincent, to see if she might have versions of recipes for making these desserts. She did, and sent them to me.
During my three-week break between fall and winter quarter, I decided I wanted to try to make at least one of these recipes. So today, I finally got around to making ost-kaka, or ostakaka as Aunt Jean entitled her recipe card.
The only ingredient that I had to go out of my way to acquire was rennet. I knew that it is used in cheese-making, and as luck would have it, there is a store that sells supplies for making beer and cheese right just up the street; I pass it every day on my way to and from campus.
In the course of making the recipe, I discovered that it was somewhat cryptic on one particular step. After mixing the rennet into the milk, it said "Let stand and drain off whey." First, how long should I let it stand? A Google search turned up this recipe which said about one hour. (This same recipe also included a specific temperature range for heating the milk. My aunt's recipe merely instructed "Heat the milk to lukewarm.")
All well and good. But then, it wasn't clear how I should go about draining the whey. I could tell that the milk had curdled — it was firmer and less liquid — but I couldn't see that the whey had separated out. It wasn't like gravy where the fat rises to the top and is easily poured off.
I gently stirred the curdled milk to break it up and see if that worked. I was then able to use a large spoon to gradually remove the whey into a separate bowl. My Google search also turned another recipe that suggested using a knife to cut the curds into squares to free up the whey.
Ultimately, I probably let the milk stand for nearly two hours and eventually ladled off more than 3 cups of whey (a significant amount considering I had started with half a gallon of milk).
So, without further ado, here is my revised recipe for Ostakaka.
1/2 gallon whole milk
3/4 cup flour
1 tsp. liquid rennet
2 eggs
2/3 cup sugar
1/2 cup whipping cream
In a large bowl, mix 1/2 cup cold milk with flour; add the rennet. Heat the remaining milk to lukewarm (98–102° F). Mix the warm milk into the milk/flour mixture. Let stand for at least one hour. With a knife, cut the curds into squares; drain or spoon off whey.
Beat together eggs, cream and sugar; mix into milk mixture.
Pour into an 8" x 11" Pyrex baking dish. Bake at 350° for 1-1/2 hours or until knife comes out clean.
Top with lingonberry preserves and serve.

The result is a light, custard-like dish. By itself, it is relatively bland, somewhat sweet. The lingonberry topping definitely adds some flavor, and is slightly tart. Some other fruit preserve could be substituted with good results.
Thursday, November 22, 2012

Pre-Thanksgiving
Most years, I make a turkey at Thanksgiving, regardless of how many people are around to eat it. Usually, I buy a bird and pop it in my mom's turkey roaster. Pretty easy and straightforward.
This year, I'm experimenting.
I subscribe to the weekly newsletter from The Splendid Table. Usually, I will glance at that week's recipe and decide it's too complicated, the ingredients are too unusual to buy for just one recipe and then just sit in the cupboard, or it calls for tomatoes.
A couple weeks ago, however, it featured a recipe for Roast Turkey with 40 Cloves of Garlic and White Wine Pan Gravy. That got my attention.
Preparation for this meal started yesterday, when I prevailed on Tim to make the base for the gravy.
I also made the seasoning rub for the turkey, as well as a pecan pie (no corn syrup!) and rumballs.
All this cooking made for a large amount of dirty pots and pans, that had to be washed before I could commence cooking this morning.

Sunday, November 11, 2012
Mimosas
Every once in awhile, my husband and I like to have mimosas with our Sunday breakfast. And when we do this, I insist on making fresh-squeezed orange juice.
It's just so much better than packaged, processed orange juice.
But it was always such a production to use an old-style reamer.

So, awhile back, we were in a kitchen-supply store and saw this product.
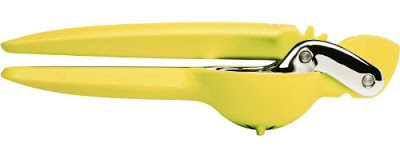
Have I mentioned that I have a weakness for kitchen gadgets? While I'm all for versatility, sometimes it's just nice to have a single-use tool that does a particular job really well.
For instance, my cherry pitter comes in handy when I want to make cherry pie.
Anyway, this juicer, while smaller than what we would have liked, being designed for lemons, looked as though it would make the task of preparing fresh orange juice much easier.
And, if we make a point of using smaller oranges, it indeed fulfills its potential.

It's just so much better than packaged, processed orange juice.
But it was always such a production to use an old-style reamer.

So, awhile back, we were in a kitchen-supply store and saw this product.

For instance, my cherry pitter comes in handy when I want to make cherry pie.
Anyway, this juicer, while smaller than what we would have liked, being designed for lemons, looked as though it would make the task of preparing fresh orange juice much easier.
And, if we make a point of using smaller oranges, it indeed fulfills its potential.

However, I'm thinking of asking Santa for the larger orange juicer.
Saturday, September 1, 2012
Of Pies and Apples
I like to make pie. I especially like to make fruit pies, which is kind of a seasonal thing.
About six weeks ago, I made a cherry pie to take with us when my husband and I went to Richland to visit his mom.
For some reason, instead of following my usual recipe (my grandmother's recipe that my mom handed down to me and my sisters), I decided to consult Mark Bittman's How to Cook Everything. I am so glad I did!
In his recipe for Flaky Pie Crust, he says to use a food processor (rather than a pastry blender) to mix the flour and butter. Genius!
That has always been my least favorite part of making pie dough, which is always a bit of a production. There are so many things in the sink that I have to wash when I'm through! Big things, such as a couple of bowls, rolling pin, and my mat for rolling out the crust, not to mention measuring spoons and cups, a couple of wooden spoons, maybe a spatula or two. And all the flour to wipe up.
It is not a tidy process.
It still isn't, but with the food processor, it's a bit less work.
My food processor is just a little one, so I have to do the top crust and the bottom crust separately. (Last week, when I made a blackberry pie, I tried to do both at once. Didn't work out so well. Won't do that again.)
I originally purchased the food processor to make hummus. That was its primary, if not sole, function until now. (I have a weakness for kitchen gadgets. A few years ago, I bought a cherry pitter. That's all it does. Pit cherries. And take up a fair bit of room in the gadget drawer. But when I want to make cherry pie, it redeems itself.)
The other good idea Mr. Bittman offered up was to put the pie dish on a cookie sheet while baking. Keeps stuff from dripping down to the floor of the oven and baking into an unremovable black residue. Duh!
I used to have a drip protector, but it mysteriously disappeared when I moved three years ago, along with a pie crust ring.
Anyway, today I made an apple pie. With Gravenstein apples. Which are THE BEST baking apples. They're what my mom always used to make applesauce.
When my daughter was little, I made applesauce with Granny Smith apples. It was okay, but something was missing. But I couldn't say what it was.
A few years ago, I poked around on the interwebs to see if I could find a local source for Gravensteins. They are unlikely to be available in regular grocery stores because they don't ship well.
I did find some possibilities, but before I had a chance to follow up, I happened to pass by the Yakima Fruit Market on the way home from work one day, and their reader board announced that they had — you guessed it — Gravensteins! I didn't have time to stop that day, but I made sure I did the next day.
I bought something like 17 pounds of Gravensteins and made applesauce. I didn't can it the way my mom used to, but instead froze it, which seems to work just as well.
When I sampled it, it was just the way I thought applesauce should be. Tart and sweet, but there was also this specific texture that seemed to be unique to Gravensteins. It was a kind of graininess, for lack of a better word.
It was how applesauce should be.
I haven't made applesauce in a few years. I still have one quart in my freezer. I should probably thaw it out and do something with it. Maybe make applesauce cake or applesauce bread.
But today I made apple pie. Do you see the A for apple?

Sunday, August 12, 2012
Busy Weekend
With my six-week-long break between summer and fall quarters coming up fast (last day of class: next Wednesday!), I did some work to get ready for doing some house painting. I'm going to start with the converted garage, but I needed to cut away some vegetation (daisies and lavender, mostly) and scrape away dirt and pebbles that have collected on the west side where the ground is higher.
Our inspector pointed this out to us three years ago, that there was some ground-to-earth contact there. Not a good thing. When I was out there yesterday, I could see where the lowest row of siding looked kind of chewed up. :-(
Tim and I went to Lowe's to look at some paint colors. We're leaning toward a light blue with white trim.
This morning, I finished up the latest in my continuing series of hand pillows.

This one is a little different than usual, in that it has a four-patch background, instead of the customary large square. I've done one or two of these, and they're a nice change. Sometimes, I don't have enough of a particular fabric for an entire large 17" square.
I also picked out the fabric for the next hand pillow, and fused the hands to the background.
This afternoon, after spending a couple of hours in the computer lab at school, I came home and made some banana-walnut-chocolate chip bread. (It's baking as I type!)
Just one of the many reasons why I *love* the interwebs! Whenever I want to find a recipe with a particular set of major ingredients — presto! Found this recipe, and this one. I only had two bananas, and the second recipe gave me the idea that I could substitute some buttermilk for one of the bananas.
(I usually have some in the refrigerator, because I use it to make my grandmother's cornmeal muffin recipe.)
It's still in the oven, but it sure does smell good, and that is always a good sign!
Monday, February 13, 2012
Caramel
Several months ago, my friend Julie and her husband went to San Francisco for a long weekend. After she came back, she gave me some salted caramel that she had purchased at a shop called Candy Darling, which unfortunately has since gone out of business.
I’d never been a big fan of caramel, so it was awhile before I sampled it. Well, when I finally did, it was revelatory. Similar to when I was in New Orleans and had fresh, never-frozen shrimp for the first time.
If the only caramel you've ever had was Kraft caramel, well, you ain't never had caramel.
This concoction was to die for!
After that, I thought it would be fun to try making my own. However, nearly all the recipes out there call for light corn syrup as an ingredient. Some others called for sweetened condensed milk. Both of these seemed like modern cheats to me. Caramel has been around a lot longer than those commercial products. I wanted something more traditional.
I finally found this recipe at about.com, which I made this weekend.
It was incredibly easy! I don’t have a 6x6 pan, so I increased the amount of ingredients by one-half, to fit my 9x9 pan. I also did not follow the instruction to NOT STIR. My understanding is that that could cause the mixture to burn and stick to the bottom of the pan.
I have my mom’s old candy thermometer, so I just heated and stirred until the mercury hit 250 degrees, poured it into the greased pan, sprinkled some sea salt over top, and let it set.
It’s pretty yummy!
Afterwards, I got out my copy of “On Food and Cooking” to see what the author had to say about caramel. According to Mr. McGee, you can make caramel from just sugar and boiling water.
I may try that sometime. I’m sure the batch of caramel I made this weekend will not be my last. But I will continue to tinker with the recipe. Do I really need to use cream and butter? What if I substituted half-and-half or even milk? Or left out the butter?
Enquiring minds want to know!
Sunday, January 1, 2012
Hoppin’ John
Today I am making Hoppin' John.
Though I lived in Memphis for three-and-a-half years, I was not introduced to the tradition of making this dish on New Year’s Day until after I moved to Seattle. Some years ago, a woman I knew who had grown up in Florida told me about it.
I did not make it last year (maybe that’s why 2011 turned out to be a year best forgotten).
I’m not a superstitious person, but it’s a tasty dish, and making it can’t hurt.
I got this recipe from What's Cooking America, but I have tweaked it a little bit.
Hoppin’ John
2 cups dried black-eyed peas
Cold water
1 pound lean slab bacon
1 large onion, chopped
1/2 to 1 teaspoon crushed red pepper flakes
4 cups chicken broth
2 cups uncooked long-grain white rice
Salt and black pepper to taste
Overnight, soak the black-eyed peas in cold water. Drain, rinse, and drain again.
Place the black-eyed peas, bacon, onion, red pepper, and broth in a large soup at least 1 hour, or until peas are tender (do not boil as the beans will burst).
Remove bacon and cut into bite-sized pieces. Return bacon to pot. Stir in rice, cover, and cook 20 to 25 minutes or until rice is tender and liquid is absorbed. Remove from heat and season to taste with salt and pepper.
Makes 8 servings.
Thursday, December 22, 2011
Rumballs for Christmas!
My friend and former co-worker Robin has on occasion brought rumballs to the company Christmas potluck. They are always a big hit (I wonder why!)
A few days ago, I emailed her asking for the recipe, and she kindly sent it.
This morning, I put on my Christmas earrings for the first time this month, put on my favorite Christmas CD, and set about making rumballs.

The ingredients

In the bowl, ready to be mixed. The small bowl to the left contains the cocoa/sugar mixture the balls get rolled in.

All mixed up

Ready to be chilled in the refrigerator
Robin said the recipe came from her maternal grandmother, and that her brother would try to see how much rum he could add and still get the dough to form a ball.
No-Bake Rum Balls
1 cup vanilla wafer crumbs (like Nabisco Nilla wafers, but you should be able to find a store brand) (crush fairly fine — a food processor works well)
1 cup coarsely ground pecans
1 cup powdered sugar
2 tablespoons cocoa powder
1-1/2 tablespoons corn syrup (Robin’s recipe called for light corn syrup, but I used dark corn syrup because I had some on hand)
1/4 cup rum
white sugar
Place 1/4 cup of sugar in a small bowl and set aside. (Robin says you can substitute a mixture of 1/2 cocoa powder and 1/2 powdered or granular sugar. Because I believe that chocolate makes everything better, I opted for cocoa and granular sugar.)
Mix together all the other ingredients. Add a little more rum if it seems dry. Form into 1-inch balls. The dough be sticky and get all over your hands. (This is very true. I had to wash off my hands after rolling 4 or 5, first making sure to lick off all I could. Don’t want to waste good rum.)
Roll each ball in sugar or sugar/cocoa. Store in an airtight contained in the refrigerator. Robin says these taste best at room temperature, but after all the flavors have melded together (about 12 hours) and should keep fresh for a week or so.
Enjoy!
Subscribe to:
Posts (Atom)